Skip to content
A strong, durable roof does more than keep out the rain, it protects your entire home from structural damage, energy loss, and costly repairs. When that protection starts to weaken, replacing the structure becomes one of the most important home improvement projects you can take on.
Although it may seem like an impossible task, replacing a roof is completely doable with the correct planning, supplies, and careful execution. The key is to start with a thorough inspection, plan carefully, and work step by step. Whether you’re tackling minor wear or a full roof replacement, understanding the process helps you complete the project safely and effectively.
From inspection to installation, let’s go over how to replace a roof and make sure your house is sound and safe for many years to come. Here’s what you should know about roofing in Quincy MA:
Comprehensive Guide to Roof Replacement
Replacing a roof requires structure and precision. Each step builds on the previous one to ensure long term durability and water resistance.

Step 1 – Inspect and Plan
Before anything else, evaluate your roof’s current condition. Look for missing shingles, sagging areas, leaks, or signs of water damage in your attic. Take accurate measurements and note which sections may need structural attention.
Next, research Massachusetts State Building Code—some areas require specific materials or permits for roof work. Use your findings to select suitable materials and estimate costs. Proper preparation ensures you’ll have everything you need when it’s time to replace the roof efficiently and safely.
Step 2 – Remove Old Roofing Materials
After planning, it’s time to remove the existing roof. Use a pry bar or roofing shovel to strip away old shingles, nails, flashing, and underlayment. Work systematically, starting from the peak and moving downward.
Wear sturdy gloves, goggles, and nonslip shoes throughout this stage. Proper disposal is just as important collect debris in bins or a dump trailer and follow local waste regulations. Clean removal ensures a smooth surface for your new materials, providing a seamless application.
Step 3 – Repair and Prepare the Roof Deck
Once the surface is cleared, scrutinize the roof deck. This layer provides the foundation for your new roof, so any damage must be repaired before moving forward.
Inspect for signs of rot, mold, or water stains. Replace any compromised boards, and confirm that the surface is completely dry and free of nails or loose material. If you discover extensive damage, consult a professional contractor to ensure the structural safety of the area before proceeding.
Step 4 – Install Underlayment and Flashing
Underlayment and flashing constitute your roof’s first line of defense against moisture. Roll out the underlayment evenly across the roof deck, overlapping seams to create a watertight barrier. Secure it with staples or roofing nails, following the manufacturer’s recommendations.
Next, install metal flashing around chimneys, skylights, vents, and valleys. These areas are most prone to leaks, so proper placement and sealing are critical. Taking the time to complete this step helps prevent future water infiltration and costly repairs.
Step 5 – Install New Shingles or Roofing Material
With your base layers complete, begin installing your new roofing material. Start at the lower edge of the roof and work your way upward, overlapping each row as you proceed.
For asphalt shingles, the most common residential option, secure each section with roofing nails and trim excess edges for a clean, professional finish. Follow the manufacturer’s pattern to ensure even alignment.
If you’re replacing your roofing in Quincy, MA, ensure that your materials meet regional weather requirements, particularly in terms of snow load and wind resistance.
Step 6 – Seal and Inspect
Once all shingles or panels are installed, seal joints, ridges, and flashing seams using a high quality roof sealant. This prevents leaks and enhances long term durability.
Then, conduct a full inspection. Check for misaligned shingles, loose nails, or gaps near flashing. Taking the time to double check your work now means you won’t have to replace the roof again prematurely due to overlooked issues.
How Long Does A Replacement Take?
In most residential cases, a replacement takes one to three days, though several factors can influence the timeline:
- Weather conditions: Rain or extreme heat can cause delays.
- Roof size: Larger roofs require more time and materials to install.
- Material type: Slate, metal, or tile roofing takes longer to install than asphalt shingles.
- Crew size: A larger, more experienced team can significantly expedite the process.
Roof Replacement Cost Factors
Replacement costs vary depending on material, labor, and project complexity. Understanding these factors helps you budget accurately and choose the best value for your home.
Material Type
Different roofing materials come with distinct price points and performance levels:
- Asphalt shingles: Affordable, versatile, and easy to install.
- Metal roofing: Highly durable and energy-efficient, but more expensive upfront.
- Tile roofing: Attractive and long lasting, though heavy and labor intensive.
- Slate roofing: Premium and incredibly durable, but requires professional installation.
Select materials that complement your climate, style, and budget.
Roof Size and Complexity
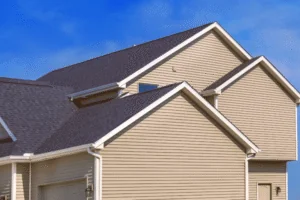
Larger or more complex roofs naturally require more materials and labor. Multiple slopes, dormers, or valleys can increase both the time and cost of installation. Accessibility challenges, such as steep pitches or limited space also affect pricing.
Accurate measurements are crucial for obtaining a reliable estimate before commencing work.
Labor and Disposal Fees
Labor typically makes up a significant portion of roofing costs. Prices vary depending on the region, project scope, and timeline. Urgent or intricate projects often demand higher rates.
Additionally, don’t overlook disposal costs. Removing and hauling away old materials can add several hundred dollars to your total project cost.
DIY vs. Hiring a Professional Roof Replacement Contractor
When deciding how to replace a roof, you have two options: do it yourself or hire professionals. Each has advantages and serious considerations.

DIY Replacement
A DIY approach can save money on labor, but it demands skill, physical stamina, and safety awareness. Before starting, assess:
- Your roofing and carpentry experience.
- Availability of proper tools and safety equipment.
- Time commitment and weather conditions.
- Your ability to manage potential risks.
If you’re uncertain about any of these, professional help may be the smarter investment.
Professional Replacement
Hiring a licensed roofing contractor ensures expert installation, adherence to building codes, and warranty backed results. Professionals also identify underlying issues such as rot or ventilation problems that DIY efforts often overlook.
When it comes to roofing in Quincy, MA, local professionals are familiar with the area’s climate challenges and building codes, ensuring that every roof meets safety and performance standards.
Maintenance Tips After A Replacement
After installation, regular maintenance is crucial to protect your investment and extend the lifespan of your roof.
Schedule Annual Inspections
Book yearly inspections to identify early signs of wear. Check for:
- Cracked or missing shingles.
- Damaged flashing or sealant.
- Leaks or water stains in the attic.
- Clogged drainage systems.
Routine checks help you address minor issues before they become major repairs.
Clean Gutters and Remove Debris
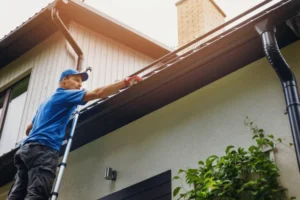
Keep your gutters clear to prevent water backup, which could damage your roof or siding. Clean them at least twice a year especially after heavy storms using a scoop or pressure washer.
Watch for Early Signs of Wear
Even a new roof requires attention. Look for curling shingles, moss growth, or missing granules in gutters. Addressing these issues early can prevent leaks and prolong the roof’s life.
Work with Quincy’s Trusted Roof Replacement Experts
While a DIY can be rewarding when learning how to replace a roof, partnering with experienced professionals ensures lasting protection and craftsmanship. Quincy’s trusted roofers manage every aspect from permits and materials to precise installation and final inspection.
Is your roof showing signs of wear or leaking? Trust our expert roof replacement contractors in Quincy, MA, to protect your home with durable materials and skilled craftsmanship. Whether you’re upgrading an aging roof or dealing with storm damage, our team handles every step from inspection and permits to cleanup ensuring a durable, worry free result built to last.
Frequently Asked Questions
1. What tools do I need for roof replacement?
You’ll need a roofing nailer or hammer, a pry bar, a utility knife, a tape measure, and a chalk line for precision work. A roofing shovel helps remove old shingles efficiently, while safety gear such as gloves, goggles, nonslip shoes, and a sturdy ladder is non negotiable. If possible, rent a debris chute or have a dump trailer nearby to keep your workspace clean and organized.
2. How do I choose the right roofing materials?
Asphalt shingles remain the most popular choice due to their affordability and ease of installation. Metal roofing is more durable and energy efficient, making it ideal for areas with heavy snowfall or high temperatures. Tile and slate, though expensive, offer unmatched longevity and curb appeal. Consider maintenance needs. Always confirm local building codes before buying, as some areas have material restrictions or fire rating requirements.
3. What safety precautions should I take during roof replacement?
Always secure your ladder on level ground and wear a harness if you’re working on a steep pitch. Never work alone having someone nearby for assistance or emergencies is essential. Avoid working in windy or rainy weather, as slick shingles can cause slips and falls. Keep tools organized to prevent tripping hazards, and double check your footing before each movement.
4. Can I replace a roof in winter?
You can, but it’s tricky. Cold temperatures make shingles brittle and can reduce the effectiveness of sealants and adhesives. If winter replacement is unavoidable, choose a clear, mild day and store the materials indoors until you are ready to use them. Roofing professionals often use specialized equipment to help maintain proper temperatures during installation, but for DIY projects, it’s usually best to wait until spring or early fall for ideal conditions.
5. What permits are required for roof replacement?
In most municipalities, including Quincy, a building permit is required for any major roof work. Some areas also require an inspection after completion. Check with your city or county’s building department before you begin—working without a permit can result in fines or issues when selling your home. A professional contractor can handle this process for you.